ProductContent
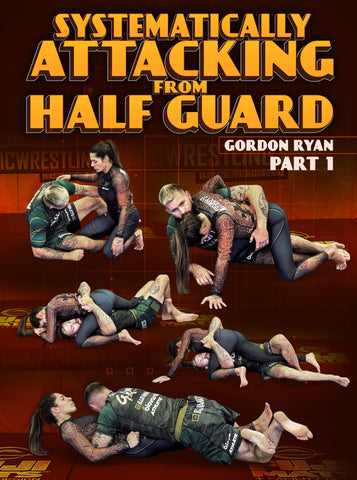
Systematically Attacking From Half Guard by Gordon Ryan
Master The No-Gi Half Guard And Attack Systematically With Moves Anyone Can Use For Rapid Skill Development From The Best No-Gi Grappler On Earth, Gordon “The King” Ryan
- Use this never-before-shown half guard system of Gordon “The King” Ryan, with sweeps, back takes, and leg lock entries that he has perfected for no-gi grappling
- Use knee shields, half butterfly guard, deep half, scorpions, and more as Gordon takes you through the half guard configurations that work best for him
- Gordon shows every detail of this system, breaking down goals, techniques, combinations, and strategies for faster development and more success from your back
- Pummel and grip for no-gi with underhooks, cross shoulder posts, pinch headlocks, shoulder crunches, and more, with techniques broken down so grapplers of all ages and levels can use them
- Gordon Ryan is the ADCC Absolute Champion and one of the best no-gi grapplers of all time, and the consensus best active no-gi grappler competing today
- See Gordon rolling in the gym from half guard and then watch as he breaks down that footage in real-time to explain the system in action
Course Content
Volume 1
CHAPTER TITLE
START TIME
| Overview of the Half Guard Series | 4:52 |
| Advantages and Disadvantages to Butterfly Half Guard | 7:23 |
| Advantages and Disadvantages to (Low/High) Knee Shield | 11:36 |
| The General Battle for Inside Position | 16:19 |
| Denying Head Control | 23:06 |
| Framing Effectively | 27:24 |
| The Centerline Shift Dilemma | 31:37 |
| Moving From a Cross Shoulder Post to an Underhook | 37:59 |
| Basic Switch to Sumi Gaeshi | 42:57 |
| Entering the Near Leg Irimi Ashi | 50:18 |
| Importance of Switching Legs | 57:23 |
| Underhook to Far Leg Irimi Ashi | 1:04:49 |
| Underhook to Cross Ashi | 1:08:47 |
| Introduction to a Scoop Grip | 1:15:31 |
| Using a Scoop Grip to Enter X Guard | 1:20:07 |
| Using a Scoop to Enter Near Leg Cross Ashi | 1:23:22 |
| Using a Scoop to Spin to Far Leg Cross Ashi | 1:27:45 |
Volume 2
CHAPTER TITLE
START TIME
| Pinch Headlock to Shoulder Crunch | 6:14 |
| Pinch Headlock Entering the Legs | 11:04 |
| An Overhook Sumi Gaeshi | 13:36 |
| Failed Overhook Sumi Gaeshi Enter the Legs | 16:32 |
| A Special Gift | 23:33 |
| Stalling From a Butterfly Half Guard | 25:08 |
| Butterfly Half to Arm Drag | 32:07 |
| Failed Arm Drag To Knee Lever | 35:59 |
| Failed Knee Lever Switch to Sumi Gaeshi | 43:51 |
| Failed Knee Lever Re-drag | 51:56 |
| Failed Arm Drag Enter the Legs | 55:59 |
| Entering Kimuras From Butterfly Half Guard | 59:39 |
| Putting it Behind the Back | 1:03:20 |
| Counter to a Hip Switch | 1:11:17 |
| Separating the Hands | 1:16:02 |
| Failed Kimura Enter the Legs | 1:21:40 |
| Closing Out the Kimura Series (Butterfly Half) | 1:27:33 |
Volume 3
CHAPTER TITLE
START TIME
| Introduction to the Lower Leg Shift | 6:36 |
| Transitioning From Half Guard to a Lower Leg Shift | 16:08 |
| Basic Sweep From Lower Leg Shift | 19:06 |
| Failed Sweep Back Take | 23:42 |
| Coming Up From a Lower Leg Shift | 27:19 |
| Options From Underhook Versus Whizzer | 31:31 |
| Countering the Whizzer with the Roll | 34:40 |
| Partner Counters The Roll, Take the Back | 40:04 |
| Opponent Wins the Battle for Knee Position Enter Hiza Gatame | 43:53 |
| Countering a Backstep From a Lower Leg Shift | 46:02 |
| Reiterating Pinch Headlocks and Moving Back to a Butterfly Half | 55:31 |
| Opponent Gets an Underhook Switch Back to Butterfly Half | 1:00:15 |
| Opponent Gets Underhook Move to Triangle | 1:02:16 |
| Opponent Crushes Knees Together Re-guard With High Knee Shield | 1:10:53 |
Volume 4
CHAPTER TITLE
START TIME
| Key Differences Between Locking a Kimura (Butterfly Half) Versus a Knee Shield | 6:57 |
| Far Arm Drag | 16:20 |
| Opponent Counters Far Arm Drag with Darce, Enter Knee Lever | 22:37 |
| Partner Postures Out of Arm Drag Entering Far Leg Outside Ashi | 27:19 |
| Extreme Staller Pumping the Legs to Create Opportunity | 33:24 |
Volume 5
CHAPTER TITLE
START TIME
| Opponent Puts Far Knee Down Enter the Legs | 8:21 |
| Opponent Puts Near Knee Down, Force the Far Knee Down | 14:39 |
| Opponent Puts Near Knee Down, Enter the Near Leg | 16:47 |
| Near Knee Down Enter Ashi on the Far Leg | 21:07 |
| Opponent Puts Near Knee Down, Exit Through the Back | 25:10 |
| Failed Back Attack, Chase the Legs | 28:55 |
| Countering a Backstep | 32:25 |
| Sweeping an Opponent Who Steps Over the head | 37:47 |
| Entering Deep Half Guard From Outside Foot Position (Far Knee Down) | 41:51 |
Volume 6
CHAPTER TITLE
START TIME
| Heisting From a Scorpion | 4:55 |
| Using a Scorpion to Pass the Leg Across | 8:56 |
| Using a Scoop Grip to Sweep Backwards | 13:46 |
| Countering Opponent’s Underhook | 18:10 |
| Using an Overwrap to Sweep Forward | 24:39 |
| The Scorpion/Lower Leg Shift Dilemma | 29:38 |
| Locking a Scorpion When Opponent Puts Near Knee Down | 35:10 |
| Returning Opponent’s Far Leg to the Floor | 37:28 |
| Countering a Knee Slip with Hiza Gatame | 41:14 |
| Countering a Far Hip Knee Slip With an Inside Elbow | 46:23 |
| The Waiter Sweep Dilemma | 49:54 |
| Taking the Back When Opponent Steps Over the Head | 59:17 |
| Back Take/Sweep Dilemma | 1:08:56 |
| Pommeling a Leg Back Inside From Outside foot Position | 1:12:48 |
| Outro | 1:16:0 |
Volume 7
CHAPTER TITLE
START TIME
| Half Guard Rolling - Drew | 5:03 |
| Half Guard Rolling - Alex | 10:02 |
| Half Guard Rolling - Sean | 15:03 |
Volume 8
CHAPTER TITLE
START TIME
| Rolling Commentary - Drew | 29:54 |
| Rolling Commentary - Alex | 59:34 |
| Rolling Commentary - Sean | 1:23:55 |
Gordon Ryan Shows The Hidden Half Guard Principles, Gameplans, Paradoxes, & More On This New 8-Volume Series - Including Live Rolling Breakdowns!
Check Out Sample!
What Will You Learn?
Half guard is one of grappling’s most common and effective positions, and now you can learn how grapplers of all levels can attack systematically from this time-tested guard with Gordon Ryan’s 8-Volume instructional series. Use knee shields, butterfly half, deep half, and more to create a unified system for sweeping, submitting, taking the back or legs, and more with Gordon’s step-by-step video manual.

This series totally breaks down all of the concepts, techniques, paradoxes, and more that make half guard such an effective position for Gordon as he competes (and beats) the best of the best in submission grappling. Learn the same moves that have worked for him as he rose to the top of the game, broken down in so much detail that students of any age and level can use them.
Find Your Way To The Back!
See the system in action as Gordon rolls from half guard in the gym, and then explains and breaks down the video so you can understand what’s going through his mind in motion. Now you can use this same goal-oriented, dilemma-based approach to half guard that can make you more effective than ever from bottom position.
Make The Scorpion A Valuable Asset To Your Game!
So, What's On The Series?
PART 1
INTRODUCTION TO HALF GUARD
THE JOHN DANAHER PARADOX
OVERVIEW OF THE HALF GUARD SERIES
ADVANTAGES AND DISADVANTAGES OF BUTTERFLY HALF GUARD
ADVANTAGES AND DISADVANTAGES OF (LOW/HIGH) KNEE SHIELD
THE GENERAL BATTLE FOR INSIDE POSITION
DENYING HEAD CONTROL
FRAMING EFFECTIVELY
THE CENTERLINE SHIFT DILEMMA
MOVING FROM A CROSS SHOULDER POST TO AN UNDERHOOK
BASIC SWITCH TO SUMI GAESHI
ENTERING THE NEAR LEG IRIMI ASHI
IMPORTANCE OF SWITCHING LEGS
UNDERHOOK TO FAR LEG IRIMI ASHI
UNDERHOOK TO CROSS ASHI
INTRODUCTION TO A SCOOP GRIP
USING A SCOOP GRIP TO ENTER X GUARD
USING A SCOOP TO ENTER NEAR LEG CROSS ASHI
USING A SCOOP TO SPIN TO FAR LEG CROSS ASHI
PART 2
ENTERING THE PINCH HEADLOCK
PINCH HEADLOCK MULTI DIRECTIONAL SUMI GAESHI
PINCH HEADLOCK TO SHOULDER CRUNCH
PINCH HEADLOCK ENTERING THE LEGS
AN OVERHOOK SUMI GAESHI
FAILED OVERHOOK SUMI GAESHI ENTER THE LEGS
A SPECIAL GIFT
STALLING FROM A BUTTERFLY HALF GUARD
BUTTERFLY HALF TO ARM DRAG
FAILED ARM DRAG TO KNEE LEVER
FAILED KNEE LEVER SWITCH TO SUMI GAESHI
FAILED KNEE LEVER RE-DRAG
FAILED ARM DRAG ENTER THE LEGS
ENTERING KIMURAS FROM BUTTERFLY HALF GUARD
PUTTING IT BEHIND THE BACK
COUNTER TO A HIP SWITCH
SEPARATING THE HANDS
FAILED KIMURA, ENTER THE LEGS
CLOSING OUT THE KIMURA SERIES (BUTTERFLY HALF)
PART 3
INTRODUCTION TO THE KNEE SHIELD
INSERTING AN UNDERHOOK FROM LOW AND HIGH KNEE SHIELD
INTRODUCTION TO THE LOWER LEG SHIFT
TRANSITIONING FROM HALF GUARD TO A LOWER LEG SHIFT
BASIC SWEEP FROM LOWER LEG SHIFT
FAILED SWEEP BACK TAKE
COMING UP FROM A LOWER LEG SHIFT
OPTIONS FROM UNDERHOOK VERSUS WHIZZER
COUNTERING THE WHIZZER WITH THE ROLL
PARTNER COUNTERS THE ROLL, TAKE THE BACK
OPPONENT WINS THE BATTLE FOR KNEE POSITION, ENTER HIZA GATAME
COUNTERING A BACKSTEP FROM A LOWER LEG SHIFT
REITERATING PINCH HEADLOCKS AND MOVING BACK TO A BUTTERFLY HALF
OPPONENT GETS AN UNDERHOOK, SWITCH BACK TO BUTTERFLY HALF
OPPONENT GETS UNDERHOOK, MOVE TO TRIANGLE
OPPONENT CRUSHES KNEES TOGETHER, RE-GUARD WITH HIGH KNEE SHIELD
PART 4
ONE ON ONE BASIC KNEE LEVER
COUNTERS TO A FAILED KNEE LEVER
KEY DIFFERENCES BETWEEN LOCKING A KIMURA (BUTTERFLY HALF) VERSUS A KNEE SHIELD
FAR ARM DRAG
OPPONENT COUNTERS FAR ARM DRAG WITH DARCE, ENTER KNEE LEVER
PARTNER POSTURES OUT OF ARM DRAG, ENTERING FAR LEG OUTSIDE ASHI
EXTREME STALLER - PUMPING THE LEGS TO CREATE OPPORTUNITY
PART 5
INTRODUCTION TO DEEP HALF
ENTERING DEEP HALF FROM BUTTERFLY HALF GUARD
OPPONENT PUTS FAR KNEE DOWN, ENTER THE LEG
OPPONENT PUTSNEAR KNEE DOWN, FORCE THE FAR KNEE DOWN
OPPONENT PUTS NEAR KNEE DOWN, ENTER THE NEAR LEG
NEAR KNEE DOWN, ENTER ASHI ON THE FAR LEG
OPPONENT PUTS NEAR KNEE DOWN, EXIT THROUGH THE BACK
FAILED BACK ATTACK, CHASE THE LEGS
COUNTERING A BACKSTEP
SWEEPING AN OPPONENT WHO STEPS OVER THE HEAD
ENTERING DEEP HALF GUARD FROM OUTSIDE FOOT POSITION (FAR KNEE DOWN)
PART 6
INTRODUCTION TO THE SCORPION
FAR KNEE DOWN, ENTERING THE SCORPION
HEISTING FROM A SCORPION
USING A SCORPION TO PASS THE LEG ACROSS
USING A SCOOP GRIP TO SWEEP BACKWARDS
COUNTERING OPPONENT’S UNDERHOOK
USING AN OVERWRAP TO SWEEP FORWARD
THE SCORPION/LOWER LEG SHIFT DILEMMA
LOCKING A SCORPION WHEN OPPONENT PUTS NEAR KNEE DOWN
RETURNING OPPONENT’S FAR LEG TO THE FLOOR
COUNTERING A KNEE SLIP WITH HIZA GATAME
COUNTERING A FAR HIP KNEE SLIP WITH AN INSIDE ELBOW
THE WAITER SWEEP DILEMMA
TAKING THE BACK WHEN OPPONENT STEPS OVER THE HEAD
BACK TAKE/SWEEP DILEMMA
PUMMELING A LEG BACK INSIDE FROM OUTSIDE FOOT POSITION
OUTRO
PART 7
ROLLING
HALF GUARD ROLLING - PLACIDO
HALF GUARD ROLLING - JACK
HALF GUARD ROLLING - DREW
HALF GUARD ROLLING - ALEX
HALF GUARD ROLLING - SEAN
PART 8
ROLLING COMMENTARY - PLACIDO
ROLLING COMMENTARY - JACK
ROLLING COMMENTARY - DREW
ROLLING COMMENTARY - ALEX
ROLLING COMMENTARY - SEAN
So, How Much Does It Cost?
349$


Here's What Students Are Viewing
-
 Pin Escapes & Turtle Escapes: BJJ Fundamentals - Go Further Faster by John DanaherRegular price $197
 -
Systematically Attacking From Open Guard Seated Position by Gordon RyanRegular price $349
-
They Shall Not Pass by Gordon RyanRegular price $349
-
The Half Guard Anthology by Lachlan Giles
$79Regular price Sale Price $39.50 -
Butterfly Guard Rediscovered 3.0 by Adam WardzinskiRegular price $149
-
Foundations of Brazilian Jiu Jitsu by Bernardo Faria
$99$49.50 -
Weight Training For Grappling by Michael IsraetelRegular price $29.99
-
The B Team Bottom Game: Imparting Wrestling, Turtling, and Heisting For Superior Results by Craig JonesRegular price $197
-
Understanding The Distance On Top by Gui MendesRegular price $197
-
Tripod Passing: Beating Inside Position by Jozef ChenRegular price $127
-
The guard Retention Anthology: Around and Under by Lachlan Giles & Ariel TabakRegular price $127
-
Under Pressure: Half Butterfly Mastery by Brian GlickRegular price $197


