ProductContent
Systematically Attacking The Legs by Gordon Ryan
Now is your chance to unlock the secrets to heel hook success, as Gordon “The King” Ryan shows you how anyone can become a leg locker with these systems and techniques he has been using through his unparalleled rise in submission grappling
- Gordon “The King” Ryan Reveals The Leg Locking Secrets That He Broke Onto The Scene And Continues To Dominate With, As He Teaches You How Anyone Can Systematically Attack The Lower Body In This 8-Volume Masterclass
- Learn how to attack and defend in leg entanglements like irimi ashi garami, cross ashi, 50/50, outside ashi, and more!
- In each position, Gordon breaks down exactly what you need to do, step-by-step, for success in staying safe as you apply seriously powerful submission holds
- Understand the best ways to apply and break with inside and outside heel hooks, and why you must have both to become a complete leg locker
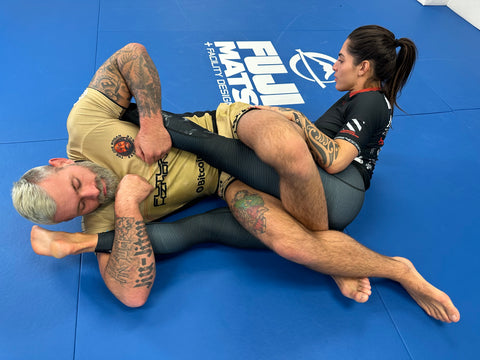
- See actual rolling footage from the gym as Gordon puts this system into action and then breaks down exactly what he was doing so you can see the techniques in motion
- Know more. Win more.
Course Content
Volume 1
CHAPTER TITLE
START TIME
| Intro To Leg Locks | 0 |
| Overview | 3:41 |
| Theory | 6:41 |
| Importance Of Inside And Outside Heelhooks | 8:37 |
| Battle Of Inside Positions | 11:25 |
| Irimi And Outside Ashi Garami Strategy | 15:05 |
| Cross And Inside Ashi Garami Strategy | 19:32 |
| 50/50 Strategy | 24:20 |
| Mutual Ashi Garami Strategy | 27:54 |
| General Escape Directions | 29:53 |
| Double Trouble | 34:39 |
| Following A Leg | 37:32 |
| Switching Legs | 39:24 |
| Basic Drills | 41:22 |
| Achilles Lock Drill | 50:58 |
| Cowboy Drill | 54:50 |
| Achilles Lock Concepts | 58:07 |
| Knee Bar Concepts | 1:02:37 |
| Toe Hold Concepts | 1:07:34 |
| Heel Hook Concepts | 1:11:17 |
Volume 2
CHAPTER TITLE
START TIME
| Intro To Irimi Ashi Garami | 0 |
| Setting An Irimi Ashi Garami | 1:53 |
| Stress Test | 5:21 |
| Basic Achilles Lock | 10:28 |
| Countering A Basic Extraction | 14:18 |
| Countering Forward Pressure With Ashi Garami And Elbow Position | 16:48 |
| Countering Forward Pressure With Post Ashi | 19:18 |
| Countering Forward Pressure With Belly Down Achilles | 22:05 |
| Switching To Butterfly Ashi | 25:27 |
| Butterfly Ashi To Other Leg Entanglements | 29:36 |
| Achilles Heel Hook Dillemma | 34:49 |
| Finishing Mechanics | 38:22 |
| Stress Test | 45:32 |
| Countering A Heel Slip With High Hands | 46:54 |
| Countering A Heel Slip With A Roll Through | 48:28 |
| Switching To Outside Ashi | 52:34 |
| Single Roll Theory | 54:34 |
| Countering A Post Knee | 59:41 |
| Figure 4 Switch If They Refuse To Roll | 1:02:22 |
| Breaking Mechanics | 1:05:13 |
| Outside Ashi Breaking Mechanics | 1:07:52 |
Volume 3
CHAPTER TITLE
START TIME
| Intro To Outside Ashi | 0 |
| Irimi Ashi Garami Vs Outside Ashi Garami | 0:56 |
| Countering A High Leg | 5:04 |
| Countering A High Leg With Wrist To Wrist Toe Hold | 8:07 |
| Controlling Outside Ashi And Denying Back Exposure | 10:28 |
| Controlling Hips By Leg Scissoring | 13:21 |
| Controlling Hips With A Cross Shin | 15:45 |
| Forward Roll | 18:29 |
| Tiny Jacket Rant | 21:27 |
| Belly Down Heel Exposure | 23:39 |
| Post Ashi Heel Exposure | 28:42 |
| Post Feet Heel Exposure | 33:09 |
| Cross Shin Heel Exposure | 35:24 |
| Stress Test | 39:12 |
| Countering A Heel Slip With A Roll | 42:32 |
| Heel Exposure On A Kneeling Opponent | 44:48 |
| Reiterating Achilles/Heel Hook Dillemma | 47:23 |
| Achilles - Irimi Ashi Vs Outside Ashi | 48:32 |
| Finishing Achilles Lock Vs Defensive Roll | 50:54 |
| Heel Knee Bar | 55:05 |
Volume 4
CHAPTER TITLE
START TIME
| Intro To Toe Holds | 0 |
| Belly Down Exposure | 1:55 |
| Belly Up Exposure | 6:31 |
| Belly Down Finishing Mechanics | 9:50 |
| Belly Up Finishing Mechanics | 11:59 |
| Toe Hold To Heel Hook | 15:59 |
| Recapturing A Knee | 18:47 |
| Calf Slice Switch | 24:00 |
| Intro To Top Ushiro | 29:38 |
| Moving To Top Ushiro | 31:12 |
| Heel Hook And Toe Hold Exposure | 34:57 |
| Double Trouble To Counter Locked Legs | 37:33 |
| Toe Hold Knee Bar Dillemma | 40:26 |
| Spinning The Leg | 45:54 |
Volume 5
CHAPTER TITLE
START TIME
| Intro To Cross Ashi | 0 |
| Leg Positions | 1:45 |
| Main Issues Associated With Cross Ashi | 5:28 |
| Basic Theory | 8:59:00 |
| Basic Leg Pummeling | 12:07:00 |
| Figure 4 Achilles | 15:47:00 |
| Reverse Figure 4 Achilles | 18:17:00 |
| Achilles To Heel Hook | 21:20 |
| Leg Lace | 25:29 |
| Leg Lace To Heel Hook | 28:36 |
| Passing A Leg - 2 on 1 Ankle | 31:29 |
| Half Dracula To Heel Hook | 34:16 |
| Passing A Leg - Double Dracula | 37:36 |
| Exposing Both Heels | 40:16 |
| Countering Primary Leg Escape With Stretch Ashi | 42:14 |
| Catching The Heel Without The Secondary Leg | 45:47 |
| Catching The Heel From Shoelace Ashi | 48:56 |
| Using A Heisting Dillemma From Shoelace Ashi | 53:02 |
| Using An Achilles To Midigate Back Exposure | 58:51 |
| Countering A Forced Double Inversion | 1:03:28 |
| Achilles Grip To Backside 50/50 | 1:07:23 |
| When All Fails, Center Chest | 1:11:30 |
| Forward Shift To Heel Hook | 1:15:43 |
| Far Hip Ashi To Stop A Roll | 1:20:38 |
| Transfer To Inside Ashi | 1:22:52 |
| Following A Roll | 1:25:57 |
Volume 6
CHAPTER TITLE
START TIME
| Intro To 50/50 | 0 |
| Attack Until You're Defending | 1:58 |
| Inside Knee Position | 4:47 |
| Separating A Semi Sankaku | 6:46 |
| Toehold / Separation Dillemma | 10:24 |
| Toehold / Heelhook Dillemma | 14:09:00 |
| Countering The Hand Fight | 15:41:00 |
| Cross Waist 50/50 | 22:33:00 |
| Sweep/Inversion Dillemma Vs Kneeling Opponent | 3:35:00 |
| Backside 50/50 Transitions | 6:57:00 |
| Following A Roll | 40:55 |
| Intro To Mutual Ashi | 44:54 |
| Going Last | 46:54 |
| Rolling Through | 49:47 |
| Far Hip Ashi | 54:20 |
| Gripping | 57:50 |
| Outro | 1:10:58 |
Volume 7
CHAPTER TITLE
START TIME
| Rolling - Placido | 0 |
| Rolling - Nathalia | 5:08 |
| Rolling - Placido | 10:42 |
| Rolling - Nathalia | 15:46 |
| Rolling - Placido | 20:47:00 |
Volume 8
CHAPTER TITLE
START TIME
| Rolling Commentary - Placido | 0 |
| Rolling Commentary - Nathalia | 13:31 |
| Rolling Commentary - Placido | 2:08 |
| Rolling Commentary - Nathalia | 35:29:00 |
| Rolling Commentary - Placido | 43:03:00 |
Now is your chance to unlock the secrets to heel hook success, as Gordon “The King” Ryan shows you how anyone can become a leg locker with these systems and techniques he has been using through his unparalleled rise in submission grappling

Check Out Sample!
What Will You Learn?
Now is your chance to unlock the secrets to heel hook success, as Gordon “The King” Ryan shows you how anyone can become a leg locker with these systems and techniques he has been using through his unparalleled rise in submission grappling.
The ADCC Super Fight Champion shows you the strategies, techniques, and combinations that have helped him become the best, including details never shared before. See all the most effective ways to control with your ashi, expose the heel, apply breaking pressure, and get the tap while slicing through your opponent’s resistance and counters.
Go through every major leg locking position with Gordon as he explains concepts and techniques to secure submissions and transition to better leg entanglements. With deep dives into all of Gordon’s techniques from irimi ashi, cross ashi, outside ashi, 50/50, and more. With this series you get direct access to the grappling world’s most notorious leg locker, teaching the precise details needed to succeed.
Watch these systems in action as Gordon rolls live in the gym and then breaks down each roll - for you to see what he’s doing and hear why he’s doing it. On this 8-volume series, you will also get the same drills that Gordon and his team use to stay ahead of the game with leg locks.
So, What Exactly Do You Get?
PART 1
- INTRO TO LEG LOCKS
- OVERVIEW
- THEORY
- IMPORTANCE OF INSIDE AND OUTSIDE HEELHOOKS
- BATTLE OF INSIDE POSITIONS
- IRIMI AND OUTSIDE ASHI GARAMI STRATEGY
- CROSS AND INSIDE ASHI GARAMI STRATEGY
- 50/50 STRATEGY
- MUTUAL ASHI GARAMI STRATEGY
- GENERAL ESCAPE DIRECTIONS
- DOUBLE TROUBLE
- FOLLOWING A LEG
- SWITCHING LEGS
- BASIC DRILLS
- ACHILLES LOCK DRILL
- COWBOY DRILL
- ACHILLES LOCK CONCEPTS
- KNEE BAR CONCEPTS
- TOE HOLD CONCEPTS
- HEEL HOOK CONCEPTS
PART 2
- INTRO TO IRIMI ASHI GARAMI
- SETTING AN IRIMI ASHI GARAMI
- STRESS TEST
- BASIC ACHILLES LOCK
- COUNTERING A BASIC EXTRACTION
- COUNTERING FORWARD PRESSURE WITH ASHI GARAMI AND ELBOW POSITION
- COUNTERING FORWARD PRESSURE WITH POST ASHI
- COUNTERING FORWARD PRESSURE WITH BELLY DOWN ACHILLES
- SWITCHING TO BUTTERFLY ASHI
- BUTTERFLY ASHI TO OTHER LEG ENTANGLEMENTS
- ACHILLES HEEL HOOK DILEMMA
- FINISHING MECHANICS
- STRESS TEST
- COUNTERING A HEEL SLIP WITH HIGH HANDS
- COUNTERING A HEEL SLIP WITH A ROLL THROUGH
- SWITCHING TO OUTSIDE ASHI
- SINGLE ROLL THEORY
- COUNTERING A POST KNEE
- FIGURE 4 SWITCH IF THEY REFUSE TO ROLL
- OUTSIDE ASHI BREAKING MECHANICS
PART 3
- INTRO TO OUTSIDE ASHI
- IRIMI ASHI GARAMI VS OUTSIDE ASHI GARAMI
- COUNTERING A HIGH LEG
- COUNTERING A HIGH LEG WITH WRIST TO WRIST TOE HOLD
- CONTROLLING OUTSIDE ASHI AND DENYING BACK EXPOSURE
- CONTROLLING HIPS BY LEG SCISSORING
- CONTROLLING HIPS WITH A CROSS SHIN
- FORWARD ROLL
- TINY JACKET RANT
- BELLY DOWN HEEL EXPOSURE
- POST ASHI HEEL EXPOSURE
- POST FEET HEEL EXPOSURE
- CROSS SHIN HEEL EXPOSURE
- STRESS TEST
- COUNTERING A HEEL SLIP WITH A ROLL
- HEEL EXPOSURE ON A KNEELING OPPONENT
- REITERATING ACHILLES/HEEL HOOK DILEMMA
- ACHILLES - IRIMI ASHI VS OUTSIDE ASHI
- FINISHING ACHILLES LOCK VS DEFENSIVE ROLL
- HEEL KNEE BAR
PART 4
- INTRO TO TOE HOLDS
- BELLY DOWN EXPOSURE
- BELLY UP EXPOSURE
- BELLY DOWN FINISHING MECHANICS
- BELLY UP FINISHING MECHANICS
- TOE HOLD TO HEEL HOOK
- RECAPTURING A KNEE
- CALF SLICE SWITCH
- INTRO TO TOP USHIRO
- MOVING TO TOP USHIRO
- HELL HOOK AND TOE HOLD EXPOSURE
- DOUBLE TROUBLE TO COUNTER LOCKED LEGS
- TOE HOLD KNEE BAR DILEMMA
- SPINNING THE LEG
PART 5
- INTRO TO CROSS ASHI
- LEG POSITIONS
- MAIN ISSUES ASSOCIATED WITH CROSS ASHI
- BASIC THEORY
- BASIC LEG PUMMELING
- FIGURE 4 ACHILLES
- REVERSE FIGURE 4 ACHILLES
- ACHILLES TO HEEL HOOK
- LEG LACE
- LEG LACE TO HEEL HOOK
- PASSING A LEG - 2 ON 1 ANKLE
- HALF DRACULA TO HEEL HOOK
- PASSING A LEG - DOUBLE DRACULA
- EXPOSING BOTH HEELS
- COUNTERING PRIMARY LEG ESCAPE WITH STRETCH ASHI
- CATCHING THE HEEL WITHOUT THE SECONDARY LEG
- CATCHING THE HEEL FROM SHOELACE ASHI
- USING A HEISTING DILEMMA FROM SHOELACE ASHI
- USING AN ACHILLES TO MITIGATE BACK EXPOSURE
- COUNTERING A FORCED DOUBLE INVESION
- ACHILLES GRIP TO BACKSIDE 50/50
- WHEN ALL FAILS, CENTER CHEST
- FORWARD SHIFT TO HEEL HOOK
- FAR HIP ASHI TO STOP A ROLL
- TRANSFER TO INSIDE ASHI
- FOLLOWING A ROLL
PART 6
- INTRO TO 50/50
- ATTACK UNTIL YOU'RE DEFENDING
- INSIDE KNEE POSITION
- SEPARATING A SEMI SANKAKU
- TOE HOLD / SEPARATION DILEMMA
- TOE HOLD / HEEL HOOK DILEMMA
- COUNTERING THE HAND FIGHT
- CROSS WAIST 50/50
- SWEEP/INVERSION DILEMMA VS KNEELING OPPONENT
- BACKSIDE 50/50 TRANSITIONS
- FOLLOWING A ROLL
- INTRO TO MUTUAL ASHI
- GOING LAST
- ROLLING THROUGH
- FAR HIP ASHI
- GRIPPING
- OUTRO
PART 7
- ROLLING - PLACIDO
- ROLLING - NATHALIA
- ROLLING - PLACIDO
- ROLLING - NATHALIA
- ROLLING - PLACIDO
PART 8
- ROLLING COMMENTARY - PLACIDO
- ROLLING COMMENTARY - NATHALIA
- ROLLING COMMENTARY - PLACIDO
- ROLLING COMMENTARY - NATHALIA
- ROLLING COMMENTARY - PLACIDO
$349


Here's What Students Are Viewing
-
 Pin Escapes & Turtle Escapes: BJJ Fundamentals - Go Further Faster by John DanaherRegular price $197
 -
Systematically Attacking From Open Guard Seated Position by Gordon RyanRegular price $349
-
They Shall Not Pass by Gordon RyanRegular price $349
-
The Half Guard Anthology by Lachlan GilesRegular price $79
-
Butterfly Guard Rediscovered 3.0 by Adam Wardzinski
$149Regular price Sale Price $74.50 -
Foundations of Brazilian Jiu Jitsu by Bernardo FariaRegular price $99
-
Weight Training For Grappling by Michael IsraetelRegular price $29.99
-
The B Team Bottom Game: Imparting Wrestling, Turtling, and Heisting For Superior Results by Craig JonesRegular price $197
-
Understanding The Distance On Top by Gui MendesRegular price $198
-
Tripod Passing: Beating Inside Position by Jozef Chen
$127Regular price Sale Price $63.50 -
The guard Retention Anthology: Around and Under by Lachlan Giles & Ariel TabakRegular price $127
-
Under Pressure: Half Butterfly Mastery by Brian GlickRegular price $197


