ProductContent
Unlock The Secrets Of MMA’s Greatest Back Attacker With Grappling Legend Demian Maia’s System For Controlling The Back & Strangling The Opposition!
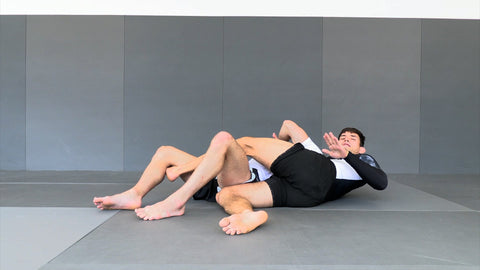
- Learn all the fundamentals and techniques you need to maintain the back position and work for rear naked chokes & more.
- Demian Maia is a veteran Brazilian jiu-jitsu black belt and UFC legend, known as one of the most dangerous and skillful grapplers in the history of MMA.
- Control and attack the back from turtle with Demian Maia’s guide for securing hooks and dominating the position.
- Keep the back against escaping opponents as Demian shows you how you can counter and shut down their attempts.
- Focus on efficiency with Demian’s careful instruction on how to use your energy wisely and technically!
Course Content
Volume 1
CHAPTER TITLE
START TIME
| Introduction | 0 |
| What Is BJJ? | 3:02 |
| What Is My Backpack System | 6:27 |
| Principles Of Backpack System | 9:32 |
| Main Control Tools | 13:14 |
| Positions Of Control | 14:36 |
| Fundamentals Of The Back Control - Upper Body Control | 15:43 |
| Lower Body Control | 19:36 |
| Techniques With Opponent Belly Up With Both Hooks In - Common Defensive Reaction | 20:55 |
| How To Get Efficient Lower Body Control | 23:23 |
| How To Get Efficient Up Body Control | 26:47 |
| Readjusting | 31:25 |
| Recovering The Back Part - 01 | 36:31 |
| Recovering The Back Part - 02 | 42:24 |
Volume 2
CHAPTER TITLE
START TIME
| Techniques With Opponent Belly Up With One Hook In | 0 |
| Common Defensive Reaction | 2:56 |
| How To Be Efficient With One Hook | 5:03 |
| Readjusting Part - 1 | 9:09 |
| Readjusting Part - 2 | 14:21 |
| Recovering The Back With Opponent Turning Part - 1 | 16:26 |
| Recovering The Back With Opponent Turning Part - 2 | 21:48 |
| Recovering The Back When Opponent Goes to the Side Without Hook | 25:25 |
| Recovering The Back Switching The Upper Body Control | 31:47 |
| Recovering The Back With No Hook | 36:32 |
| Half Triangle Control | 41:28 |
Volume 3
CHAPTER TITLE
START TIME
| Techniques With Opponent Belly Up With Triangle Body Lock | 0 |
| How To Close Body Triangle | 4:31 |
| Foot Lock Defense | 11:44 |
| Foot Lock Defense Part - 2 | 18:17 |
| Common Defensive Reaction Part - 1 | 23:39 |
| Common Defensive Reaction Part - 2 | 29:19 |
| Controlling Turtle Position | 35:41 |
| Turtle Position With No Hooks | 40:25 |
| Putting The First Hook | 46:27 |
| Following The Guard Pull | 1:00:21 |
Volume 4
CHAPTER TITLE
START TIME
| Turtle Position One Hook | 0 |
| Reajust | 3:02 |
| Putting The Second Hook | 8:33 |
| Putting The Second Hook Second Option | 14:31 |
| Top Foot Hook | 18:01 |
| Reajust | 23:01 |
| Following Guard Pull | 26:59 |
| Turtle Position 2 Hook In - “Espalha Frango” | 30:56 |
| Preventing Stand Up | 35:53 |
| Triangle Bodylock | 37:54 |
| Standing Up | 41:40 |
| Common Defensive Reaction | 44:00 |
| Readjusting Neutral Control Falling Backward | 45:15 |
| Readjusting Neutral Control Falling Forward | 47:15 |
| Readjusting Neutral Control Sideways | 49:07 |
| Stand Up Triangle Body Lock | 54:02 |
| Conclusion | 56:51 |
Become A Human Backpack With A New Ability To Stick To The Back Using The System Demian Totally Explains On This 4-Part Series!

Check out a free sample:
What Will You Learn?

Join one of the best grapplers in the history of combat sports as Demian Maia shows you his total gameplan to one of his signature positions, attacking the back and securing devastating chokes. With a step-by-step approach you will learn his methods that made him maybe the best MMA grappler of all-time with one of the most effective back attack systems ever.

Demian Maia is a veteran black belt competitor in Brazilian Jiu-Jitsu who successfully transitioned to MMA and became a legend through his UFC run. Known for his dominant and refined skill on the ground, Demian would systematically break down opponents and often finish with his signature rear naked choke. Now, you can learn those secrets here.

On this four-part series, Demian shows how he controls someone from the back position, including how he shots down their escape attempts and maintains the back. Learn how he uses his backpack system to work through an opponent’s defenses and secure submissions, and how he works with maximum efficiency with his movements.
Win with Demian’s technical help as he shows how he breaks down the turtle position and takes the back, including how he secures hooks and controls them with simple grappling skill. Grapplers of all levels can benefit from Demian’s help, as he shows you he same handy tools he used to build such a legendary MMA and grappling career.
So, What Exactly Do You Get?
PART 1
FUNDAMENTALS OF THE BACK CONTROL
TECHNIQUES WITH OPPONENT BELLY UP WITH BOTH HOOKS IN
PART 2
PART 3
PART 4
$197


Here's What Students Are Viewing
-
 Pin Escapes & Turtle Escapes: BJJ Fundamentals - Go Further Faster by John DanaherRegular price $197
 -
Systematically Attacking From Open Guard Seated Position by Gordon RyanRegular price $349
-
They Shall Not Pass by Gordon RyanRegular price $349
-
The Half Guard Anthology by Lachlan Giles
$79Regular price Sale Price $39.50 -
Butterfly Guard Rediscovered 3.0 by Adam WardzinskiRegular price $149
-
Foundations of Brazilian Jiu Jitsu by Bernardo FariaRegular price $99
-
Weight Training For Grappling by Michael IsraetelRegular price $29.99
-
The B Team Bottom Game: Imparting Wrestling, Turtling, and Heisting For Superior Results by Craig JonesRegular price $197
-
Understanding The Distance On Top by Gui MendesRegular price $198
-
Tripod Passing: Beating Inside Position by Jozef Chen
$127Regular price Sale Price $63.50 -
The guard Retention Anthology: Around and Under by Lachlan Giles & Ariel TabakRegular price $127
-
Under Pressure: Half Butterfly Mastery by Brian GlickRegular price $197


